Thursday, March 29, 2012

Pinky

Pinky’s birthday is 17th of September, or that is the invoice date that started that she is 4 weeks old by that time. I keep the invoice as her birth certificate. She is a female Roborovski, white-faced, originated from Mongolia. I always picture how Genghis Khan and his troop would react when they happened to encounter these cute little creatures. The tough soldiers might drop their weapons, play and awwww and not killing someone that day.

She was the only female in her batch, got a little bit of blond hair, and very active. We bought her a nice little pinky cage with pinky wheel and pinky food tray. It was very cute but soon I made another trip to buy her a two-storey cage because I don’t like to see her that limited. She could explore little house, slide and have bigger wheel.

She liked to relax at what I called as the ‘balcony’ area and staring at us. She recognized my voice and I could help to pamper her by giving her some treats every morning, peeled sunflower seeds. She would jump around happily and eagerly wait for me by pushing her face in between the trellis.

She can be solitary, but I would like to give her a friend. We brought her back to the shop by motorcycle so that she could choose her friend. It was a twenty minutes ride and I put her in her original box with ventilation, we were using motorcycle.

When we reached the place, Pinky was not moving. We tilted the container, she was still not moving. We called out to her a few times, I had the worst fear all of the sudden, then she woke up. She had good sleep because she liked motorcycle ride too, like me. It was scary minute.

So we put her in big container and the shopkeeper picked us another hamster, half her size because she is already adult size while Brownie is still a kiddy. We have heard so much about hamster fights, it was worrisome when Browsie ran and tackled her. What she did? Being that active and that lively that she is, she just kept quiet, eyes closed while Brownies excitely said hello, then they became best friends.

Brownies is timid and shy, while Pinky had the highest spirit, very energetic happy little gal. She responds to my voice every morning and jumped up and down waiting for the treats, while Browsie looked from the corner. Her energy was contagious, and I suspected she taught Brownies a lot of things. Soon later, both of them jumped up and down every morning but they never fight, because I always fair, almost always.

After a while, Pinky seemed not to like her two storey cage that much, so I moved them to container where they have bigger running space and I can interact with them from top, something that we couldn’t do when they stayed in the cage. It was not easy to tame them, but after a while, they recognized my hand, and willingly climbed up and hung on patiently while I transfer them to another place where they could run and play more freely, sometimes in special corner on the floor with supervision, sometimes in the tub. Brownies is still more timid but easily tamed, while Pinky was very smart and could learn what to expect in few tries. Climb to hand is vacation, holiday, explore new places.

Soon after, both ,especially Pinky even let me stroke their head until they slept, just like a puppy. I could pick Pinky up and hold her in my palm while I stroke her head and she would just stay quiet.

When we came back from our long trip last year, I notice that Pinky had somehow became smaller, or maybe Brownies is fatter. Brownies grew to her size in very short time but they were always compatible until after the trip she was significantly smaller. But she was her usual self, jovial, energetic and whoever said hamster don’t recognize your affection, is wrong. They jumped when they heard our voice and happily running around when we were back, not hesitating for a minute before climbing up my hand again.

Since she seemed smaller, I started to give her more treat when Brownies was not looking. Hers, actually, both favorite food is steamed sweet corn. Steamed! If they got it, they would run to the corner, enjoyed and sometimes asked for more. I only gave them two seeds at a time because it must be a full meal for them. They could smell it far far away, and I often found them sniffing the air with excitement even before I was close to their home.

To prevent them from being bored, I bought many type of foods and mix them in one container so that they would always have something that they like. I liked to create mazes, houses, tunnels because it must be very boring staying inside. That was only so much I could do for them. I had plan to bring them out to the park, although I would need to keep them in the ball, but at least they can run around and smell the grass, however, I didn’t have chance to do so.

I started to notice that Pinky has difficulty peeing, she would take so much time just to squat in the corner. Sure enough, I notice some growth on her kidney area.

I had hamsters before, when they were sick, we brought them to pet hospital and the vet couldn’t do anything for them because they are too small. So basically, I knew there was nothing we could do.

But Pinky never stopped inspiring me. I stopped playing with her or let her climb up my hand because I afraid I would hurt her. Every day, she still responded to my voice, jumped up and down happily all the same and did so until yesterday, the last day of her. Her physical condition had become significantly worse but her action and movement remained the same high spirited and energetic as ever. Everytime I called her, she would run around, jump out and down. Her size had shrink down to half of Brownies, eventhough she didn’t look as pretty, Brownies didn’t care, they still like to cuddle together and grooming each other.

Since she became much smaller, yesterday she seemed to have difficulties in climbing up to the sandpit, unlike before. So I changed her home nicely to thickest bedding so she can be as comfortable, best quality and thickest sand pit with mini staircases so that she could climb more easily. She still eagerly explored her newly changed house as usual, kaypoh and curious, very active and snatch her favorite corn from my hand excitedly.

She enjoyed it for a day, and this morning she was motionless next to the staircase I created especially for her.

Up until her last breath, she never down and low spirited. Beside her physical appearance, she was the same active playful loveable Pinky since 17th September 2010.

She is the small creature who touch my life, and inspire me to be strong and never down. I want to be as strong as her. She never showed her weakness and showed me that she was happy every day.

I brought her to special resting place where she can finally enjoy being around the nature, where cicada sings to her every time every day.

With great sadness, I’m missing you, Pinky. All hamsters go to heaven.


Thursday, January 26, 2012

Previous Dioramas

For the latest one plus the making:

P.S: Some rant: I don't provide the link to this post from The Making of Hobby Classroom post, because I don't want to edit the post anymore since it goes haywire everytime I edit. The spacing will be randomly paced, font size changes, title disappears, part of text missing. It's maddening!


PREVIOUS DIORAMA

I have idea of displaying my minis in dioramas not long after I started collecting, but I have to find a cabinet to keep them so they remain good and intact.
The very first and original diorama that I create was a combination of Old Kitchen One and Two, random size, no display and almost falling apart because I can't make the portable display permanent so that I can still access it.

With that, luckily I found a simple glass cabinet with glass shelves in IKEA.

It's supposed to be a CD cabinet, each shelf module is approx 30.3 L X 16,3W X 15.5H centimeters. It's the best option I can find and I like it. So I have two of these cabinet, side by side, means I can put 20 dioramas, it will take me years to fill up the cupboard.
(to this day, 14 modules had been filled, 6 more to go. Not so bad! It's faster than I thought :))

Here are the 12, since 2 latest dioramas have been posted in separate post.
I will just include brief descriptions, I hope.


1 & 2. OLD KITCHEN ONE & TWO


Old Kitchen One

Old Kitchen Two

They are twins, so their story is about the same.
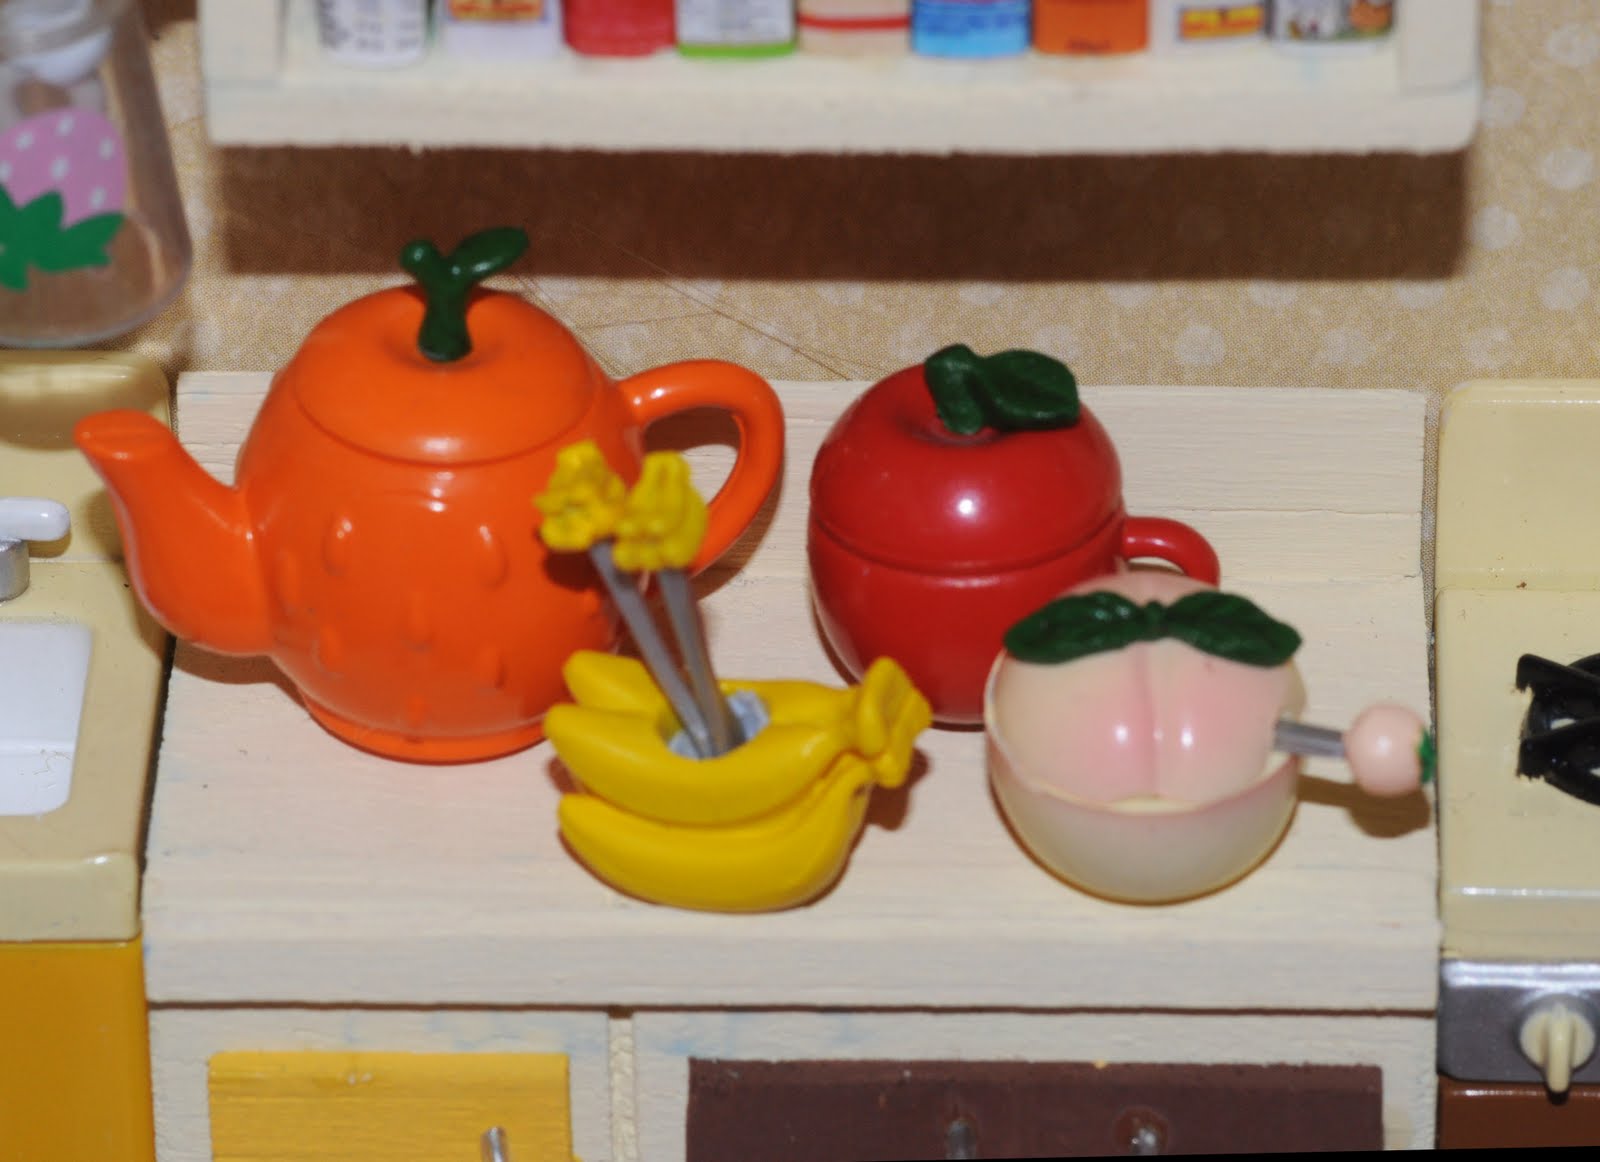
I have these sets of traditional Japanese kitchen props, chinese festive food and chinese traditional kitchen, I also have the vintage looking sewing machine, some mini wooden furniture I got randomly from 100Y shop and Art&Friend, and mini porcelain kitchen wares with traditional chicken pattern.

With that, obviously, the idea is to put in traditional kitchen, with mixture of two cultures but it's not noticeable. Because of very limited furniture, I made use of those plant display/base, with hubby's help with sawing, voila, almost no serious planning is required. No sketches, no confusion, just some trial and error and I get the lovely kitchen that reminds me of my childhood. Kitchen with chicken and sewing machine inside.

Anyway, the picture look horrible with a lot of bluetacs here and there, pictures always show too many details. It doesn't look as bad in the real miniature. One day I will take better pictures of them, but for now, I can't take off the diorama from the rack without moving the rest. It's domino chain because every diorama had to be fixed into the cabinet from the bottom (not from front), then i will put the legging for it to sit in before another diorama is being fixed below the previous.
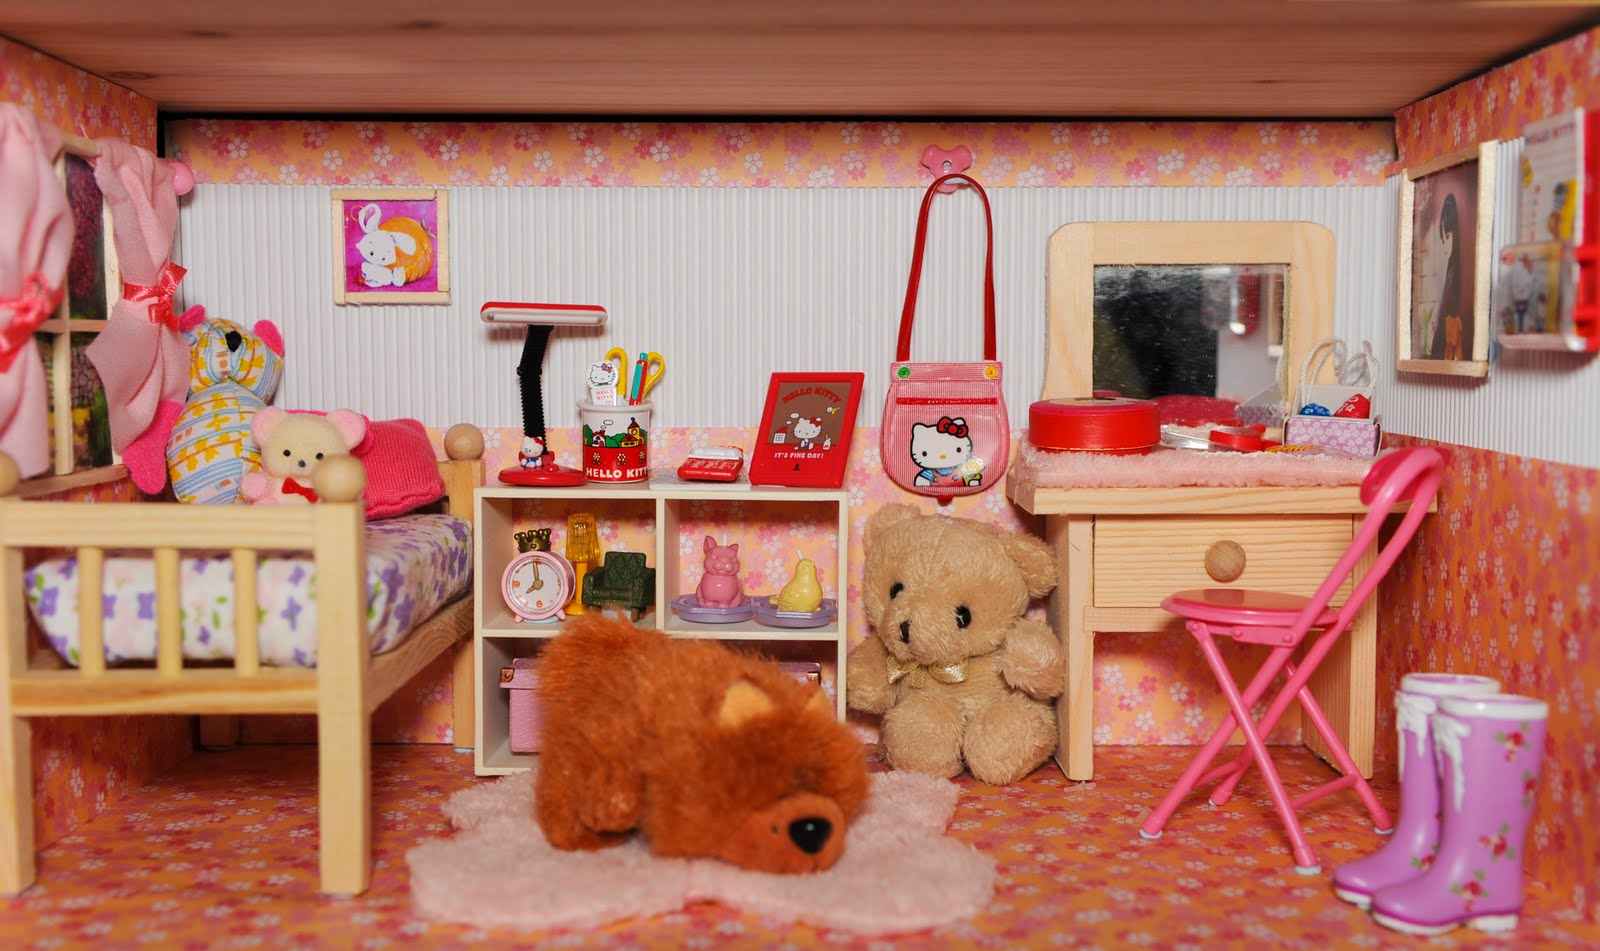


3. GIRL"S BEDROOM


This is probably the easiest and least complicated diorama.
I have the wooden mini bed and dresser I found randomly from Art & Friends. It's basically already the major fitting there. I had good idea how to fill in between because I have the beige rack from another set and it is already very fitting with the rest.
For the color, again, easy, it's almost always pink for girl. I have a set of pink flower origami paper and leftover pink fabric from a bolster, ex-bolster for the curtain.

The chow chow is a gift from my Dad many years ago, he gave me sets of mini cats, mini dogs and mini rabbits, this chow chow is my favourite and it will be belong here. The teddy bear is a wedding souvenir from a friend. It might looks big, but in real life I do have a gigantic teddy bear that looks similar to that. The chair and the boot is from another miniature set, the colors can't be more fitting for this diorama. The Hello Kitty stationery item also fits. Teddy bear on the bed is from a birthday bear for my friend but never had a chance to pass it to her, the small teddy bear is bought during my uni time just because it was cute. So everything is really meant for this room. I just found few suitable pictures and scenery to decorate the wall.

Casualty: a new pink-orange micro fiber towel for the carpet on the floor. Many times, in miscellaneous household neighbourhood shops, there are always colorful so-called micro fiber towel sold in very ridiculous price. For example, this one only cost fifty cents for the size that can make four of this carpet. Too bad they are too furry and thick, otherwise it will be excellent props for craft.

Girls' Bedroom is probably the diorama that take the least time, if I'm not wrong, only 2-3 not full days.


4. FRUIT STALL

I have a miniature fruit set, and there comes a humble fruit stall. The rack and display are either made from balsa wood or from the wooden boxes that is supposed to be for planting. The wine rack is a magnet contributed by my parents. They put in together with my other miniature display and I found it's suitable here. (once in a while they will put something they found on my miniature shelves without my knowledge because I'm fussy..he he. the other time I found mini jackpot lighters, and another I found a pair of mini bride and groom clay souvenir on the bed of Girl's Bedroom).

There are not as many fruits in a set, so I added in some artificial mini grapes that can pass a big sized plum, I also added in lemon and orange from eraser sets that I have eventhough it's a bit gigantic, the colors brighten up the scene. The wooden crate from 100Y shop is also a great addition.


5. SUSHI BAR

My first completed set purchase is a Japanese sushi set. It started from an innocent visit to toy shop in Hong Kong year 2008. At that time, detailed miniature is foreign to me. (although I had the idea when I was a kid twenty over years ago that someone should makes realistic daily stuff in small doll size ~ they steal my unexpressed idea!)

To my surprise, I found a lot of mini figurine in HK and purchased some mini Doraemon figurines and I thought that's it until I stepped in a toy shop for fun, and discovered a display full of realistic miniatures; from street food stall, tiny cart, tiny plastic chair, chop stick, noodle, friend tofu, fish ball to daily stuff, kitchen stuff, food, all in mini size. It was a four-five story toy shop so there was enough stuffs to captivate me and my husband for quite a long time, which for me, mostly spent just in that particular area. The big dilemma was, if I left, hopefully I can forget their existence. Bahaha.. but if I buy, just a little, just a piece, I know there is no looking back, although I still try to fool myself. Anyway, finally, if your childhood imagination comes into reality, would you let it pass? Difficult!

Anyway, I chose that set that time because it will be easier to display as it is. Some other set, as great as it was, are part and pieces of stuff or furniture that is not so nice standing alone. So after I got back, I bought a mini acrylic shelves for toy display and put them up in barely few hours, then I feel the withdrawal, bad.
After I acquired another set and displayed it the same way, I was not satisfied and from then on the idea of making it into diorama born.

Beside being the first set, this diorama was the fifth diorama created because I had reservation and doubt about how to make the furniture since there was no pre-made stuffs that I could use. It's also difficult to fit a sushi bar into such a small modul and still make sense. So with some wood, paint, sticker, bamboo mat, print-outs I finally got it up.


6-KINDERGARTEN

By far, this one needs the most improvisation. There are so many things from different sources being put up to form a scene. It's one of my favourite based on the amount of effort, but if there is a thing that I regret, it's the floor material. I would probably change it into a more bare or monotone pattern and color so that the diversity of the stuffs will stand out more.

The main inspiration for this diorama is the Sam tuxedo and Hello kitty set (a more plus, after I had this set, the full set had became very rare therefore became expensive).
The cute mini orange bicycle is probably the best detailed mini stuff from my non-mini era, I got this from a toy sale fair. They pack big bag with various random toys inside for ten bucks. It's great! I eyed it especially because of this bicycle, which I got together with curious george, ball, magic beanie toys, rubber toy ropes, and various other things.

The plastic blue and yellow chairs are from 'stacking chair' toys just like those other stacking game concept. The sizes are just nice and the primary colors fit perfectly.

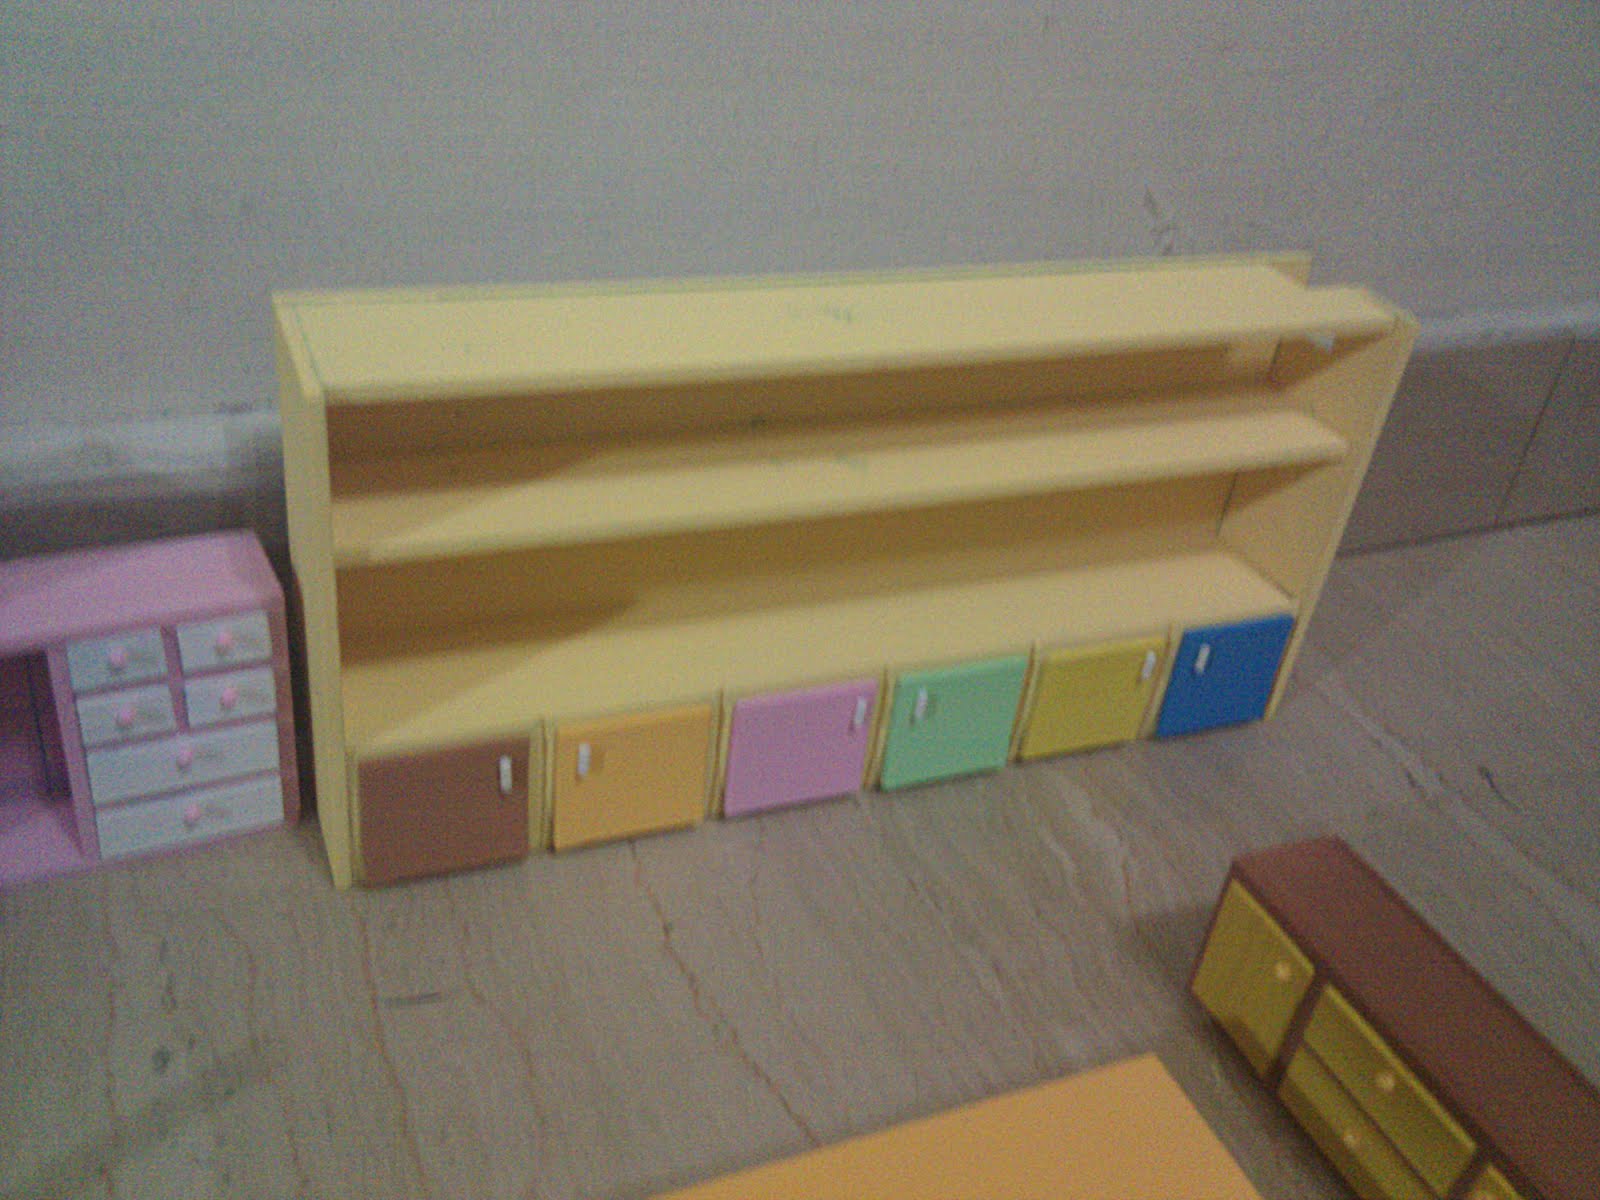
The flower table & round cupboard is from another miniature set. Wooden colourful cabinet is made from painted balsa wood. Some pots and drinks are from eraser set. The various wooden animal figures on the wall are stripped from wooden paper clips. The small house figures on the left wall are part of random key chains. The shoes are from some third party Barbie's toy accessories, although one or two pairs are original. The rabbit and elephant toys on the floor are from those ball machine key chains.

The blue shoe rack and table is from the 3d wooden craft. I thought it would be suitable and it's a jackpot. The color came out very nicely on this wooden material. Too bad they don't produce more modern looking furniture.
Only the small side table is utilized here.


The cupboard is utilized as shoe rack, the rest of the chair and table is utilized in diorama 9, Mahjong Room.

As random as the origin from every part of diorama, probably the most random from all that I've created, it's good fun and I'm very happy that everything come perfectly together.


7 & 8. MICKEY MINNIE BAKERY & COSY CORNER

Bakery

Cosy corner

When the main miniature manufacturer started to market in the US, they collaborate with Disney to create Disney theme furniture. The first few sets were still good, the details, quantity of the set are still the same, however, they come in slightly bigger scale. When I bought some of them, the prices were still normal, however, as recently, those in Disney theme are sold in ridiculous price just because they are Disney. Yaiks, luckily I stopped buying them anyway when they started to put much less pieces and even less significant pieces in sets.

Okay, I think I made it clear that I'm not really a fan of too much Disney theme miniature (even though Donald Duck is my favourite man :) because I prefer realistic mini, but they do have few very good set and the Mickey & Minnie bakery & Cafe are some of them.

I made it a goal to find mini red and white checker fabric because for me, it's a must have item for these two diorama, based on one of my favourite steak house in the uni (not so much for the food, but for the memory) and some other cosy restaurants that I have visited in the past. Luckily I found it in the fabric shop and they sell it in half-a-meter.

This is probably the first diorama when I started to do sketching. Because it's so thematic, the sets are hard to be incorporated in another diorama. The bread, the coffee grinder, the spoon, cups, burger, everything are in mickey head or pants shape. That's why I have to display as much as possible in the diorama and decided to make it a double diorama.

Originally the idea is to make double storey diorama with a staircase leading to the cozy corner from the bakery. However, staircase takes too much space so at the end of the day, it's just the same related theme with my made up story that the bakery and cosy corner are separated by small outdoor space where the customers can walk over to each place. Bahaha..

Since it would be too cramp to put in more than one sets of chair (the 'wrought iron' chair and table set from 100Y shop, supposed to be planting accesories) I have to fill in the space with a magazine rack and memorabilia. Those nostalgic Disney comic book, paper, bottles of spices and figurines.


9. MAHJONG ROOM

As much I like computer games (not so much when they start to convert everything in 3d), technology has taken over a lot of social connection and activities, which is a pity in a way.

When I was young, in my family, we like to play card and as bets, we used colourful candy wrappers that we kept. I still remember it had 'monkey king' print and come in colours like red, blue, green, yellow. I always looking forward to the card session before sleeping time.

The card game stopped for quite a long time when we grew up, moved to Jakarta, etc etc and we resume the family activity in mahjong game everytime we reunite. So it always has soft spot in my heart. I created this diorama based on how my mom likes it. Bright room, big window, a lot of flowers, food for everyone, her favourite book, and doggies for me. :)


10. LAUNDRY ROOM


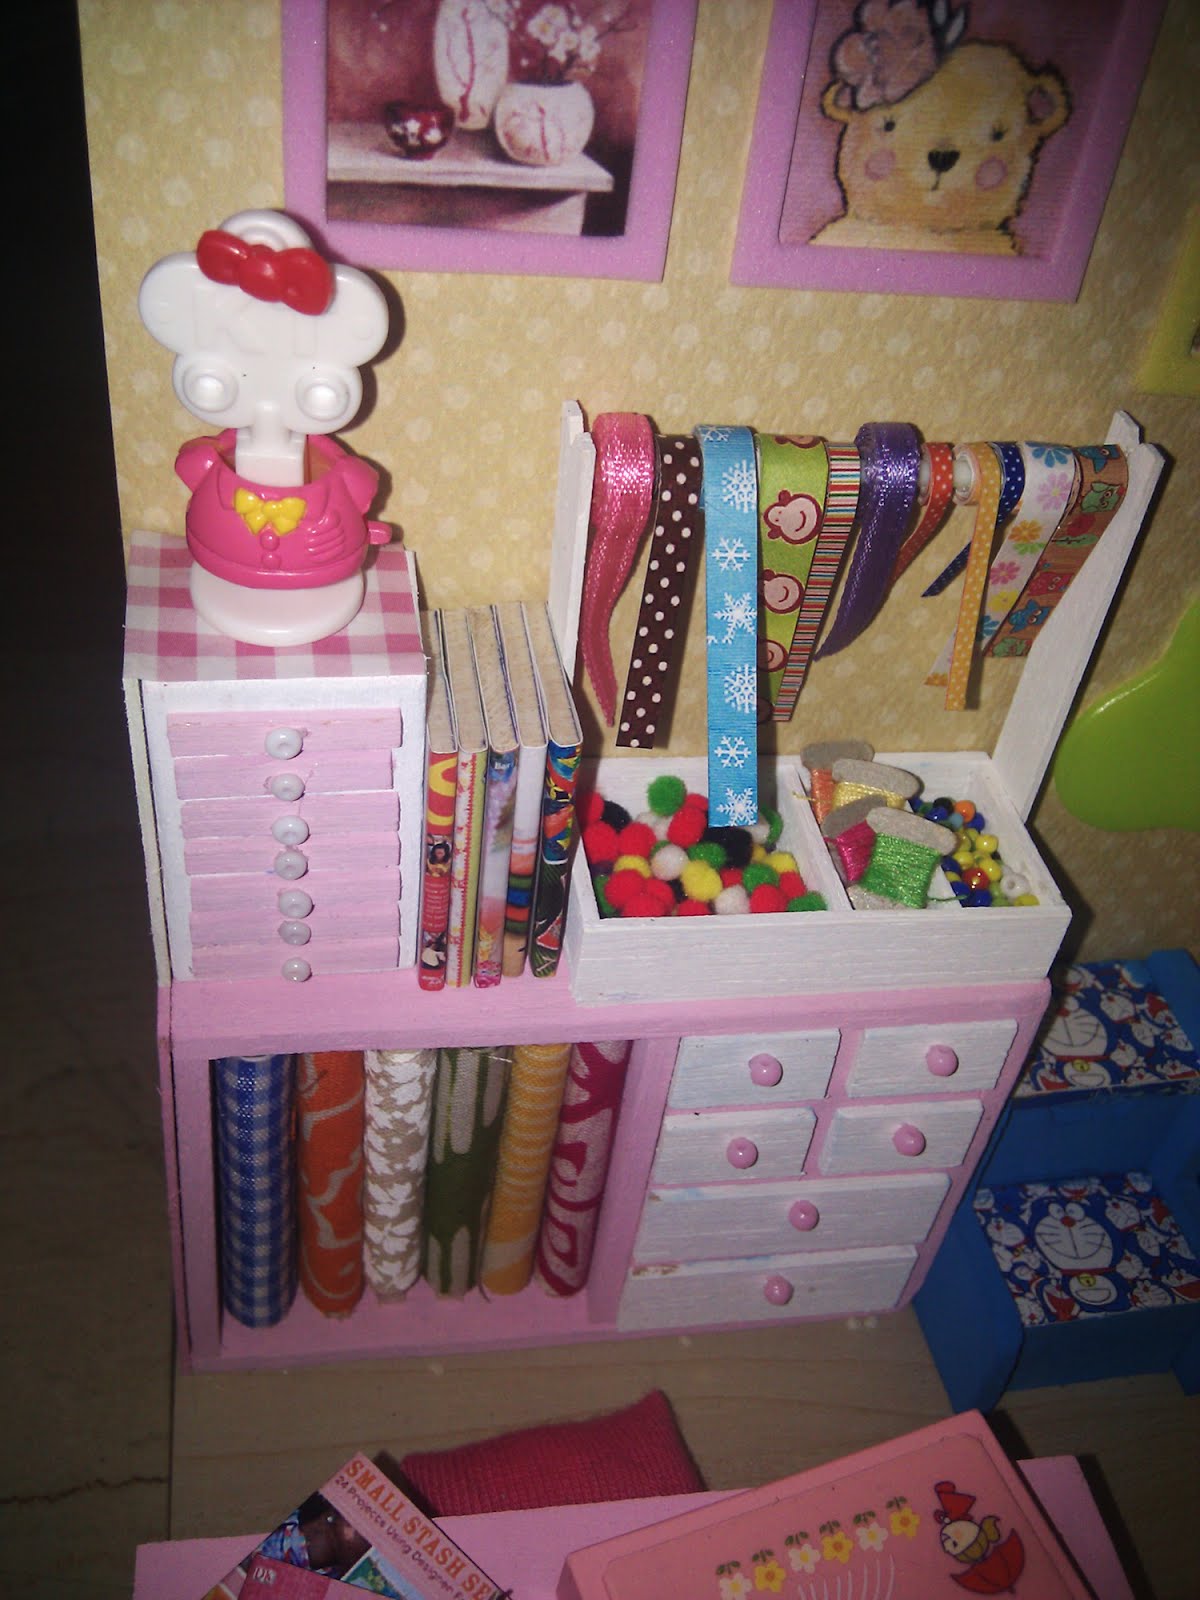
My favourite pieces of miniatures are the one that resembles the realistic things in life. So the iron, cloth hanger, cloth clips, dehumidifier boxes, detergent, bucket etc are driving me crazy. The best way to display the various items like this is in an utility or laundry room.

Since i have the idea, I always wanted it to be in fresh lime green color. So much that I made special exploration to find the right paper color for the wall paper.
Normally when I start with diorama project, I keep it going until finish. However for this one, after I create the cabinet, I had mood block for a long time before I continued and finished the whole diorama. Mood is really really important, I had few days to few months to more than a year non productive time in between creating diorama because of mood. Ha..


11 & 12. RESTAURANT

I like them all, but if I had to choose one diorama that I like the least, it is this one.
I have one set of miniature that can only displayed in one way, restaurant. It's a mini food display, really food display with flying spoon, chopstick or pouring cream.

So this one probably has the least story of all.
Beside this set, majority of miniatures made in the market are food, so I took this opportunity to put as many mini food as I could, especially those in the table. They came from various sets, older and newer sets, from various manufacturer companies.

To add to the continuity of the diorama, I put mirror at both ends. I bought two cheap square table mirrors from household shop, broke the plastic frames and used the mirror only.
The tables and chairs are made from painted balsa wood. Food display cabinet are made from hard plastic and painted styrofoam.


So those are a little bit of background story for each of my miniature before the last one in previous article.

The Making of Hobby Classroom

I decided to make a documentation of this diorama making, because this will be a very interesting and complex diorama project for me. Anyway, for every diorama there are quite a lot of making story that I could only put in caption thus far.

So I think it's worth it to write it down in full, with pictures.

Tips: skip the sidenote for pure story of How It's Made. It's just me rumbling around and it tends to happen when I write. It doesn't affect the full story but it's relevant enough. I tried to put in in different color but again, blogspot feature can be annoyingly unresponsive many times.

See? Yup, here we have the first one already!note: I'm never good in documenting. I only take scenery during most of the trips I went, then found out it's lack of continuity and pictorial descriptions when I write the journal. Reasons because it's inconvinient to whip out camera anytime, and I also have 'camera concern' (they don't have term for 'narsistic-opposite/anti narsistic' yet?), so as much as I really want to take picture of locals and everything in their daily life, I always share the feeling of not wanting to invade their privacy). Above all reason, I'm actually LAZY. Yah, that is probably the most accurate. He he... So it's always nice when I travel with travel mates who are good in documenting, from airport, food, street name etc to help me with my journal later on.way, for this one, I really try to document everything I could. Of course I miss some, still, but it's not that bad. There are a lot of pictures!'

It would be a full scale double diorama with a lot of details and cute stuffs, full of colors and story, and I imagine I would have a lot of fun making it.ARTING

I have collected some amount of miniature for the span of 3+ years. Mostly they are from the older days of diorama when the details and varieties are still very nice. Nowadays, not so.

From every piece that I have, I have imagination of what kind of diorama I can create.


'Sidenote: So I actually have unoficial (read: written somewhere, normally at the back of any kind of writing material I'm holding when I started to think about minis, always missing and need to be rewritten everytime) list and had crossed some of them.

Done: bakery shop + cozy corner, fruit stall, old traditional kitchen, girl's bedroom, kindergarten, mahjong room, restaurant, laundry room.

The ones that are still on my list such as beach, back yard, bathroom, birthday party, market, mama shop, boutique, confectionery, nursery, full size kitchen, street food. It might or might not happen because there might not be enough material.'


Anyway, I like to stroll through 'weird' and unusual toy, craft or stationery shop.
Normally I found things like art & craft stuff, fabric, stationery that I like, I will buy them without planning and most of them ended up being useful. There are a lot of examples that I will put along the way.

Back then there used to be an old style stationery shop below my block and I could always find something interesting. Now that traditional and modern stationery shop below (there were two!) had been replaced by other shops. Maybe I'm the only one who miss them, but I do.

Another rule for me, this is a hobby. Hobby gives enjoyment, but waste money, so I don't want to waste more money that it should. Therefore I will not spend unreasonable amount because there are many more useful things I can do instead of spending too much on the minis. Some prices in cyber world are ridiculous because good minis are not really in production anymore.

Anyway, this is the example of how the diorama idea started.

So I have this cute set.

This set consists of ten small boxes of school related thingy. I bought the last box (the pink sewing box) separately from e-bay long long time before I found the entire set at reasonable price.

Out of the blue, I found the set when I went to Taman Anggrek Mall Jakarta in 2010, I had few hours of transit after a trip and my friend wanted to know how Jakarta mall looked like, so I chose Taman Anggrek (my Jakarta knowledge is sooooo year 2000), we took a cab from the airport, spend two-three hours there and went back to catch our flight.

Box 10. Sewing kits

Box 3, chemistry experiment equipments.

Box 4, musical instruments.

The suitable diorama to display this set is in classroom setting. It's almost one and only option, unless I separate them out for supporting other diorama, which is not a rare idea but not for box no.3.

Box no.3 contains stuffs we can only find in laboratory or class, if I don't have classroom diorama, I will never ever have a chance to display this box because I will not make Laboratory diorama. Siao! Except this box, nobody on earth who are capable will create more lab bottles, tiny microscope, germs or bacteria, and it's certainly too rigid and not easy if I want to custom-made the whole laboratory. (Read: I'm lousy) Also, laboratory might not be as cute.

Anyway, even for classroom, I actually only have so much material. For the whole set above, there is only 3 full box that I can use; sewing kit, laboratory & musical instruments. I can use some pieces for the rest of the boxes but it's quite dissapointing that I can't use the bag on 1st and 2nd boxes, because they are slightly too big to be put together with my other school bags. Anyway, they are monotone and waste too much space to be incorporated.

So, long story short,

Okay, classroom diorama it is.

What is next....

ETCHING

SKETCHING

Sketching is not a must-do, for some diorama they are very minimal to none, especially the earlier ones. However, for this one, I need a lot of planning to get it to the standard that I want.

spent a lot of time in sketching, partly because I didn't have the mood to actually start building it for sometime, so I would just refine the sketchings and ideas.

This is one of the unofficial list and the first time the classroom idea was throw into play. I named it kindergarten with wrong spelling still. I already had kindergarten and the activities here are way too mature for kindergarten. But I just anyhow named it. Scribble paper is not for judging.

(Decide to call this Hobby Classroom at the end. I'm sucker at names I know)

See the preliminary planning is single diorama with basic classroom layout. Few pieces of table, blackboard, some cabinet. I toyed with this idea for some time, but didn't like it. My three main displays are sewing, chemistry and music. How on earth should I have to put each theme in each table and make sense? A classroom setting like that is suitable for something uniform. Same table, same seating, same book, same subject of learning. Maybe different stationeries which certainly not what I'm looking for. They don't need blackboard too.

The idea developed. What I should do is to create a classroom, but an unusual classroom. At first I'm worried that I didn't have enough material to fill it up (again, the idea started with only 3 usable boxes), eventually I found ideas enough to even pull a double diorama, and to make it interesting, with a mezzanine. Light bulb has 'ting' ..


'Sidenote:'Sidenote: Reason why I want to make a mezzanine is to create a cosy corner with children scale.

Everyone may have some chance to go back to their childhood home. I had that chance once, and it amazed me about how everything seems much smaller now; The cement yard I used to run around, the chicken cage I used to sit inside and starred at the sky, the water pipe that I used to climb up to second story (I never used staircase unless my parents are around nearby), the living room etc etc.

Everything seemed so big when I was small. That was why we/children like to turn around the sofa, covered it with blanket and pretended it was our house. Because we need something on our scale, and mezzanine it is. It brings the roof closer and the scale more relatable to children to achieve more cosy look.

(Yah, I probably think too much)'


sketches


sketches


sketching is not messy, so it was still possible to do it mobile, before sleep, while watching teve, I dragged this process a bit longer because once I started with the works, there is no turning back until I finish, the mess, eye strain, back pain, sticky and colorful fingers, etc etc..


I don't really do full scale sketch much, but it's quite essential now because I have to make the furnitures myself. With very limited space, precision certainly helps a lot in producing and not wasting materials.


sketches

voila

isclaimer: this is going to be learning classroom with activities for very very talented kids.

my favorite ruler, be-loo-dy usefull that I have three of those. Well, not because I need three, because I abuse them greatly, unintended. First one is not perpendicular anymore because I cut with it (yah, it's horrible but it's really help the accuracy). Second one is melted. Yes, melted. No I didn't use flamethrower. Yes, I'm still not allowed to have my own flamethrower. It's melted because i put it together in the drawer with UHU glue, that leaked all over the ruler and melted the plastic. Powerful UHU!

ORK STATION

WORK STATION

This is my work station, it's small, but not bad. Anyway just outside the picture, I have a neat charging station (read: few power socket), so I can listen to music or podcast, plug in my laptop to watch anything if I want some visual company, play WOF and other games while charging my handphone, plug my glue gun if needed.

I try to keep it neat at all times. But when I'm working on something, it looks like train wreck with spilled paints plus a dozen of chickens and ducks running around.

Stationery drawer. Before I have this, I can't even find a pen easily. Now this helps a lot. Believe me.

Below is where I keep my art&craft stuff. It's only been up for about a year plus. With very very limited space, these containers really help keeping it neat. Anyway, it's also fast and efficient when I start packing it back, after I scatter every box and everything inside the boxes all over my room when I'm working on diorama.

But I hate all these paper roll, they fill the spaces in between nicely, but not nice to look at.


Inside the boxes are all the bit and pieces thingy that I have, fabric, wooden pieces, glue, ribbons, sponges, paints, wire, brushes, sticks, strings, beads, mats etc etc. For bigger pieces I put it somewhere else. Ah ya, the UNO Stacko doesn't belong there, the weight also. The purpose of the weight is to keep the box's lids neat by gravity. He he.. the UNO was out because initially I dug it out from my store room so that I can play it with friends in a short trip few weeks earlier (but I ended up never bring it because it was too bulky and my friends are way more resourceful with games).


PREP

EP

ince I'm documenting this down, this diorama probably has the best preparation. No rush, nothing compensated, I try to make everything as satisfactory as possible and take my time.

This is the print out of children book covers. Easy, internet search, photoshop to put them efficiently and access to printing. I need a lot lot lots of books.


These are the candidate of the possible minis that I would probably use for the diorama. I never did this for other diorama, but for this one I really have to make sure that I have enough to display. I ended up using probably only about 35-40% of them, the rest I have to improvize from another sets.

MEZZANINE

THE MEZZANINE

Starting the work by creating the mezanine first. No product placement here, but I happened to have a box that is very suitable for the mezzanine because of the thickness. For the rest, I can add many small boxes to make up for the size and the steps.

(It works either way, vice versa. The diorama have to fit with the resources that I have, or I will find the resources to fit the diorama. The first option happens way more often).


Tiny boxes from toys


Paper stuffing from unused brochures. There are unlimited amount of brochures you can find in every mailbox here daily. It's amazing how many waste papers are produces by advertisement industry.


I stuffed the boxes with crumpled papers so that it's at least won't sink in irresponsibly where there are weights on top of them. However, this method is not perfect as it would make the boxes slightly curvy as much as I tried to press them down or reduce the mass. It ends up giving me some accuracy problem later on but it was all solved.

The small boxes are the boxes I kept from toys, I hardly keep boxes, somehow luckily I know those neat boxes will come in handy someday.

With a layer of thin cardboard + wood texture sticker for the floor, and brown sticker for the section, here comes the mezzanine.


These are the table mat I got from IKEA for good price. It has nice color choices (although I can't find the Olive color, it's in the dining room display, but they don't have stock for sale. No particular reason why I want the olive except I like it). These mats suitable for minis because of the fine texture and material. They already have some cameos in my previous dioramas.


During the making, I felt that carpet floor is more suitable for the mezanine because it's supposed to be more cozy area. Instead of changing and ruining the existing wooden sticker, I just add it to the top. It added significant thickness and problem at the end when I try to fit in into the display cabinet.

Since I ran out of balsa wood, I explore new shop I found few months ago, and found their price is significanly cheaper than Art & Friend. It's a engineering model shop that sell kits for remote control. So they have new customer.

Balsa wood is favourite for crafting, because it's easy to cut using only cutter. The downside, it's more expensive and not good for painting. The wood might bend and the color won't look as nice as normal wood. However, even with the downside, it's still preferred choice compare to the option of having to use woodsaw for crafting.


THE FURNITURES

Since I have a lot of furnitures to do, I decided to mark on the wood to get efficient cutting and minimize wasting of material. However, it's very very bad idea, because apparently it can't be covered with many many many layers of paint. So I will go back to my old way of just hacking it instead of playing neat and nerd by marking them first.

cut cut cut

The making of the book. Wood, book cover print and glue.


Wah... am I making way too many. Actually I planned to make more but I stopped myself.


Temporary container for the books.

Now I'm starting to make the major components of the dioramas:


MINI KITCHEN

E MINI KITCHEN

Look at this cute kitchen above, it's produced by a manufacturer that has stopped making miniature, so it's a vintage! But came into my possesion at reasonable price, much to my delight. However, there is one unknown problem until I saw the real thing. The size is too small to go with other miniature. It's children size (in mini), probably can pass as something like Easy Baked Oven, or those realistic kitchen toys for kids.

That is why I think it's appropriate to be part of classromm, where the main users are children, a reason to have mini children scale kitchen there. And this is also the reason why I dared to span the diorama into double diorama because kitchen is already a big filler of the space.

The sink and the oven will be lonely by themselves, so I will create more extensive kitchen with numerous cabinets.

After the plannings and cuttings etc, here is the cabinet.


Using poster paint, I'm trying my best to match the beige color. Mixing color can be tricky and difficult to repeat, that's why it's good to make sure that I made enough amount. Sometimes I mix way way way too much paint but the paint can be stored inside very tight mini container and still can be used perfectly in the future. For this project, as the local slang is, the paint's amount are all 'cun cun sui sui'. No more no less.


Now I'm trying to match the darker yellow (on the sink) and brown (on the oven).


Painting started and there comes unfortunate revelation that no matter how many layers I put on the wood, the pen marking would still appear.


Preliminary fitting with colors.


Ohya, there seems to be a lot of colors in my pallete, but it's not. Above is the picture of my palletes in CLEAN condition. The colors are permanent, resulted from perhaps 'too lazy to clean fast enough' from previous project, especially if I used fabric paint, which is more rubbery, fast drying and almost impossible to wash away once they stick (that's why they are good for fabric!)

Ohya, I have this nice looking watercolor brought from neighborhood market long long time ago. I thought I can use it to color some wooden stick but watercolor is not meant for wood.


OTHER FURNITURES

Now I will put together other furnitures.

Notice that I purposely made hole at the cabinet corner, to fit it in my display cabinet nicely. This can be PITA (Pain in the ass) and spoil the look, but if I forget to take it into account, I will have to hack the completed diorama later on or find another cabinet to display. None of them is good option.


'Sidenote: In my previous laundry room diorama, I made a full cabinet and forget to allow some space in the corner for the rack support. Since it's impossible to cut it without damaging the diorama, I push the whole cabinet in front, resulted in diorama being shallower than the others. Luckily, Laundry Room didn't have a lot of display in front.

This is the book rack for the art & craft mezzanine.


Chemistry laboratory table & chairs, sewing cabinet & drawer, stepping chair, staircases etc.


Sofa cabinets, wooden stick and low tables.


These are all the main furnitures, clockwise: kitchen cabinets, laboratory table & chair, sewing cabinet, book rack, sofa cabinet, tables for each class subject and Doraemon stepping chair.


Book rack, each color of the locker represents the colors I had used previously.


Sewing cabinet and sewing drawer. Note that the left side are seriously scarred from the marking, which need some damage control later on.


Chemistry laboratory table and high chair.


Doraemon stepping chair

AFTS


CRAFT

Since I have quite limited relevant mini that I can display, I have to make some.

I need more musical instruments. These are xylophones, made from painted wood and clay for the button and round end. The small white buttons are driving me crazy for the whole course of the project. They - don't - stick - easily and they are too freaking small for glue applications.


Some of discovery might not see daylight for years. Such as these ones, I bought it 12 years ago (!) for a model making project that actually made money. These are ... uh.. furry bits, not sure what they are for.


I use them to fill this 'pieces & bits' rack, together with the realistic-color beads I just got few days ago.

This is the idea for fabric roll.


Since I only have very limited pieces of small-patterned fabric (leftover from another DIY projects), I have to find a way to make it look like a full roll.


So, it's cheating using paper.

However, during the making, I found that it's more natural to use the real fabric roll, but the only small-patterned fabric that I have enough is the red and white checker I especially bought from my previous Mickey Minnie Bakery shop diorama.

Luckily, I have some colorful batik fabric piece I got from my sis-in-law. The patterns are tricky, but somehow I find it fitting quite well.


Fabric station


I'm making some string rolls using real strings and hard paper.


Before I find out a simple white piece of plastic and string can do real wonder.


Check this out. The string rolls look really realistic.


Another printing works for measurement tape and ribbons.


There comes the ribbon station.


I have to dig the whole bottle of beads to find a similar looking white beads to be used as drawer handle for sewing. But, look at the first 20 white beads I dig out, none of them are in the same shape and size.


Look what I found accidentally few days ago


It could probably be a perfect prop to display these eight adorable strawberry pattern transparent tea cup from independent unknown brand, love them!

Transparent tea cup reminds me of our own back then, where they belong in our metal dish cabinet, something that looked just like above.


Here you go, with help of Mr. Pliers.


Super duper cute mini strawberry patterned glass cup


I'm sucker for paper, I love colorful papers. These are tiny origami paper in my possesion for a long time. Back then I used it to make 1000 origami birds for well wishes for one of my relatives.


It has 14 different colors.


With just one pages for each color, I could make a stack of mini origami paper in the size of 1.5 X 1.5 cm. For the fun (and suffering) of it, I made the mini origami birds also.

I think it's close with the world record size for mini origami bird!


Ice cream stick is popular props for arts and craft in real world. So I have to include them in the mini. If cutting them is not much of a problem, painting them is quite a messy affair. I managed to make 8 different colors.

I need washing soap. This is made from clay, paper and printed label. This is an unplanned object and I'm pleased with the result.


'Sidenote: sometimes I have good idea about how to make an object, but it ended up in disaster and failure. Sometimes I thought it wouldn't be decent and it ends up working well visually. I love this handwashing soap. It's really an emergency put up plan. I only have a very very small lump of yellow clay and soap label I printed for my previous Laundry Room diorama.'

It's my luck that I found this art wire by chance.


With that and some thin craft mattresses, I can make tiny slippers


without glue, good for me


Why I say everything without glue is good for me? Because of these horrifying molecules that I make to add to the chemistry scene. It was killing me, everything falls apart one at a time. I glued my hand to the table, to each other, in the joint, lost part of my finger prints, and it's still an ongoing battle long after it was supposed to be a completed object.

This is the uglier tryout version of the molecule, I might still use it to add colors.


I need more things for my chemistry laboratory, but there are not many objects suitable.
Lab bottles, of course, but I can't make those, what else is easier?

There comes above, grinder. This kind of grinder normally found in chemistry laboratory, made from soft-air-dried clay.

MINI OBJECTS

THE MINIS

As I mentioned previously, I am not a collector, I'm a just freak hobbyist. That's why I don't fancy spending unreasonable amount of money to hunt for those items that I like (well, main reason because I can't afford to do so). Some of these products are sold at very ridiculous prices, some collectors buy two or three same kind sets just so that they still have the original untouched set when they used the others. Some bought them just to look and to keep. Blessing in disguise, I enter this hobby a bit too late that many of the manufacturers do not produce good quality minis anymore. It's not good, but it's good for the pocket.

So I only buy those in reasonable prices and that is with a lot of consideration (believe me, a lot! I'm never a spender for physical stuffs (read: can't afford)). This collection comes into my possesion in few years span, and just recently I found decent place to store them, in my upper wardrobe.

Beside full sets, I have loose boxes that normally sold at more friendly prices.

So, let's start utilize some of the minis!

This is a more recent set, I got is as a gift from a good friend of mine when he went to the mother country of the minis (Japan) and he got me this cute box. It based on Rilakkuma character.


This is the contain of the box


It has a very cute pan that will fit very nicely on the mini stove in the mini kitchen.


This is a doggy hot water flask from another set, same manufacturer with the kitchen set. It's small and nice, and the childish doggy theme will be suitable.


This is another set that is suitable for mini kitchen and it's very kiddy.


Real porcelain cups from independent manufacturer


Another random eraser set that happens to fit into the diorama


Doraemon super mini sticker to decorate the blue backpack


Cute bags from various sets + the eraser blue doraemon bag


Ball from another set, I happen to have the net from a random eraser set

Book set with traditional carrying band, I still had one of those band in real-life size, a gift from my cousin-sister. This is from another kiddy miniature set.

A Hello Kitty box. It's slightly big, but so called used for keeping art & craft mini stuffs.


Mushroom tic-tac-toe set! No one is winning.


Watering can, another eraser piece.

Can of colorful paper roll, random addition to the scene


'Sidenote: I was in 2nd grade when I came early to school one day and found a set of brand new gorgeous eraser shaped as yellow slipper with red bans on the floor. As owner of inheritated white green eraser with picture of country flag (maybe those in thirties can relate to this), it's a very luxurious thing for me and became my lucky charm. I wish that many children nowadays still treasure little things like we did last time. Anyway, eventhough fancy erasers are normally useless for erasing, keep making them manufacturers!'


Tiny tiny rabbit toy


Mini book, it's actually a very accurate functional books, with pages, lines for writing and everything.


This is one of my favorite favorite sets, look at this, mini watercolor set of ten with each individual paint bottle. Faint!

It always breaks my heart a little that I have to open and use minis, especially the ones that I like and very difficult to find in the market anymore, however, I believe they will be happier in diorama instead of hidden in the box. (I just happened to watch Toy Story marathon)

Mini skipping rope from box no.8

I've forgotten to take many mini pictures that I use, but you can see them in the completed diorama.

Now....

PUTTING EVERYTHING TOGETHER

PUTTING ALL TOGETHER

The completion time!


SHOE RACK & ROOF GARDEN ACCESS

Slipper rack below the staircase to roof garden. If you don't want to get your feet dirty, grab a slipper before you go to the roof deck. Of course I support barefooting also, as long as you wash them before you come back.


Access to the roof garden. With all the fun with cooking, sewing, chemistry, art & craft, don't tell me I forget something important because I'm not. Of course there are plants, outdoor, skies, but it's located up there you can't see. Climb this ladder with the guide of the lady bugs.

(Lady bug is made from normal hole puncher + white pen)

Enjoy some sports when you are up there, skipping, ball, don't forget to bring the can up to water the plant. Added a tiny pattern to live up the yellow water can.


ART & CRAFT STATION

Water color set + paintings


Color sticks


Homer Simpson 3d origami set. Making the tiny 3d origami head is quite a pain in the ass too.


Stack, colorful and pattered origami papers with the origami birds


The tiny dinosaurs and animals are eraser set I got from a random bookshop last year.

It's tiny, detailed and cute, I knew I was going to have chance to use it.


Added in the unfinished octopus and lump of clay


The most important test, those tiny pieces should be able to fight gravity.


This is the completed art and craft station. Clay modelling, origami, cutting, 3d origami, stick craft, watercolor painting..


KITCHEN


Basket & flask


Tea cooking pan I believe

Cereal collection from real cereal labels in the market


Cute kiddy theme kitchen set, just nice


Washing dishes will never be easier with 3 choices of sponges


Completed kitchen scene
I have the extensive cereal rack idea based on what I saw from Seinfeld. I always notice that he has something similar. If you like cereal for breakfast, I don't see there is anything wrong with having that many choices!

The basket is from older vintage set that I like a lot, and it's small enough to be included in here. Dishwashing sponges are just some cut-out craft fabric.

There are some cookies inside the oven. It's good fun making the cabinet, except for the cabinet door and drawer handles. Keyword. Glue. Flimsy. Glue. Small. Argh.

CHEMISTRY STATION

Nice chemistry experiment set. I add in the pipe, pipe is leftover from bead's necklace string.


Nice lab bottles and cute wooden rack


Molecules


This is the completed chemistry station. Beside the original sets, and things that I made, I added in a mushroom shaped candle and transparent base from another set, and 'pipe' from the leftover of bead necklace I made for my niece.

This station has to be all nerdy, Periodic Table of Elements, Molecule, chemistry reaction etc etc. Chemistry is my favorite subject in high school. Yah.. nerd? I remember all the arrangement of the periodic table back then, with all the numbers and codes. Now I can't remember beyond H2O. I will move the molecule to the table when the diorama is split into two inside the display cabinet.


BOOK & SOFA CABINET


Cute mushroom clock & toys


Completed book cabinet with spidey


This is the completed sofa cabinet and message board in the art&craft room. Originally I want to put kiddy calender but scrapped the plan last minute because my attempts turned out horrific. So calender is replaced with message board decorated with children crafts and colorful post-it notes.


SEWING CABINET


I like the measuring tape. It's quite brutal to create..


Ribbon + bits & pieces station


The finished sewing table. It's pinkish!


Sewing cabinet for fabric, beads, buttons, models, ribbons etc. Edge wooden piece that is quite unpleasant to the eyes is actually added to cover up the other unpleasant-to-the-eyes because of leftover marking on the wood.


NOW THE WHOLE COMPLETED HOBBY CLASSROOM


Left/Diorama One: Mini Kitchen, Chemistry Lab, Sewing and Music Station. I suppose it's not advisable to have kitchen beside chemistry lab and sewing area, but in here, it's okay!


Right/Diorama Two: Art & Craft station, book rack and ladder to roof garden.

There is a sliding stair for kids to take the books on the upper cabinet.